It is whilst standing in queues at the supermarket or at the airport, that I notice how many people are walking around with poorly fitting spectacle frames. The importance of frame alignment at the point of collection appears to be very much neglected these days. The success of a visit to the optometrist cannot be limited to a clinical assessment and refraction. The ultimate patient satisfaction will also be determined by the frame choice and fit. Frame selection requires a culture of positive emotional labour - care.
Photos taken of fellow shoppers - C Faul
Careful frame
selection should meet three criteria:
- Look good - compliments
- Feel good - comfort
- See good - good optics
A good way to go about frame selection is to inform the patient: “You have all the say in the Look Good, but I carry the responsibility for the Feel Good and See Good, and mine trumps yours.
Unfortunately, manufacturers have become fashion-centric and have snubbed the importance of eye and bridge size options, temple length, and pliability of the materials. It stands to reason that meeting the three criteria above requires a decent frame selection. This, in turn, demands purposeful buying in terms of long temples, big faces, small faces, bridge options, pantoscopic angles, etc.
I was in a queue yesterday, and it inspired me to revisit a five-step approach to fitting a frame that I devised many years ago, which I called “sweeping the frame”.
The key to success is that the Frame Stylist must understand the requirements to achieve a comfortable frame fit that also does not compromise the prescription's optics.
The reason for sweeping the frame upfront is that it will avoid a compensating error once the frame is placed on the face. For instance, the temples are misaligned, as are the ears, at unequal heights. Once the frame has been swept and is hanging lower on the left side, we know it is caused by uneven ears and not by an inherent misalignment of the frame itself.
Spectacle frame alignment
A comfortable-fitting spectacle frame defines ultimate customer satisfaction. The process starts with selecting a frame with adequate dimensions, which will allow manipulation and adjustments once the lenses have been fitted. Nobody’s head or face is exactly symmetrical, and each individual has unique features, which will impact how a spectacle frame sits on the face. Ears are usually not positioned exactly at the same height. One ear may be higher or lower than the other. The bridge of the nose may be relatively high or low in relation to the eyes. A head may require very long temples (side pieces) or very short ones. The position of the ear, where the temple sits in relation to the place where the frame sits on the nose, can hugely influence the fit and optics of spectacles. It’s very important that the optical dispenser takes note of all these features and selects a frame that can be fitted to overcome them.
Sweeping the frame
This is a phrase my colleagues and I came up with many years ago. The reason for sweeping the frame before we fit it to the face is to avoid a compensating error. This ensures that no misalignments are hiding in the frame before you place it on the customer’s face. Misalignments can easily occur during the cutting and fitting process of the lenses, as well as with temperature changes when frames are in storage.
Once the frame has been swept and placed on the face, any misalignment can only be present due to the anatomical features of the customer’s head and face. Now, if the frame is hanging lower on the left side, we know it is caused by uneven ear height and not by an inherent misalignment of the frame itself, such as a twist in the bridge.
Let’s sweep
Note: this is done before fitting the frame on your patient

Fig.1
Step 1: View from the top
- Look for a twist on the bridge. This is best done by holding the frame so that you can view it from the top (Fig. 1). Tilt the frame slowly so that the bottom rims become visible. They should appear simultaneously. If you see more of one rim, there is a twist in the bridge.
- Look for excessive bending of the frame front or a negative bend. It should never be dead straight; the ideal being a gentle curve around the face.
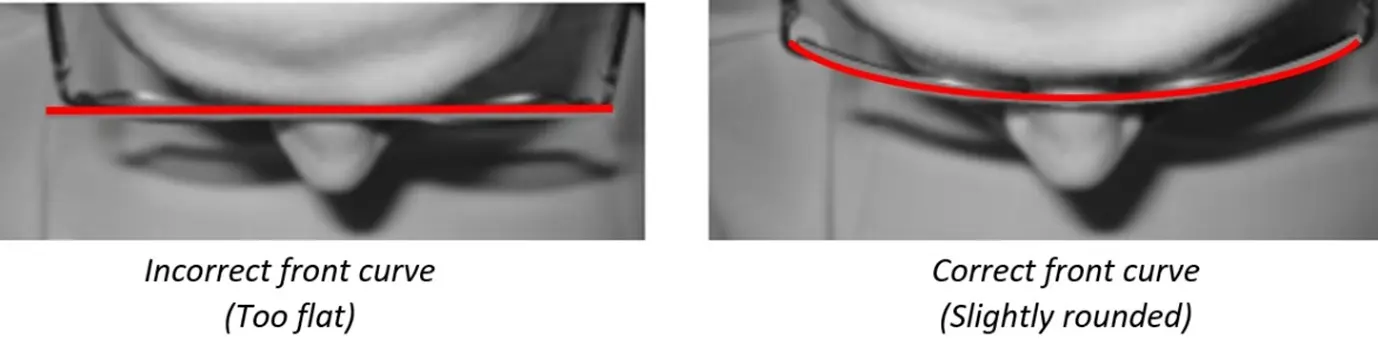
Fig.2
Step 2: Top view of the angle of the front with the temples
- The angle between the frame front and the temples should be approximately ninety degrees.
- Moreover, they should be equal and symmetrical.
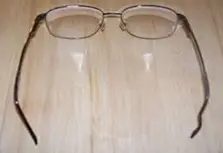
Fig.3
Fig.4
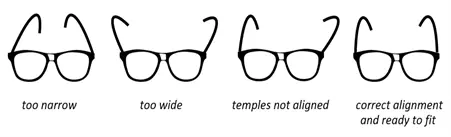
Fig.5
Step 3: Side view of temples – are they aligned?
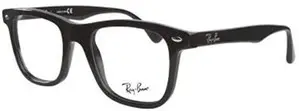
Fig.6
You don’t want one temple to point up or one to point down. They must be exactly parallel. A twist in the bridge will result in this and should be seen as the primary cause. By heating the frame on the bridge, the twist can be corrected, and the temples will be parallel. If you don’t notice the twist in the bridge and simply angle the temples to bring them parallel, you will create a compensating error.
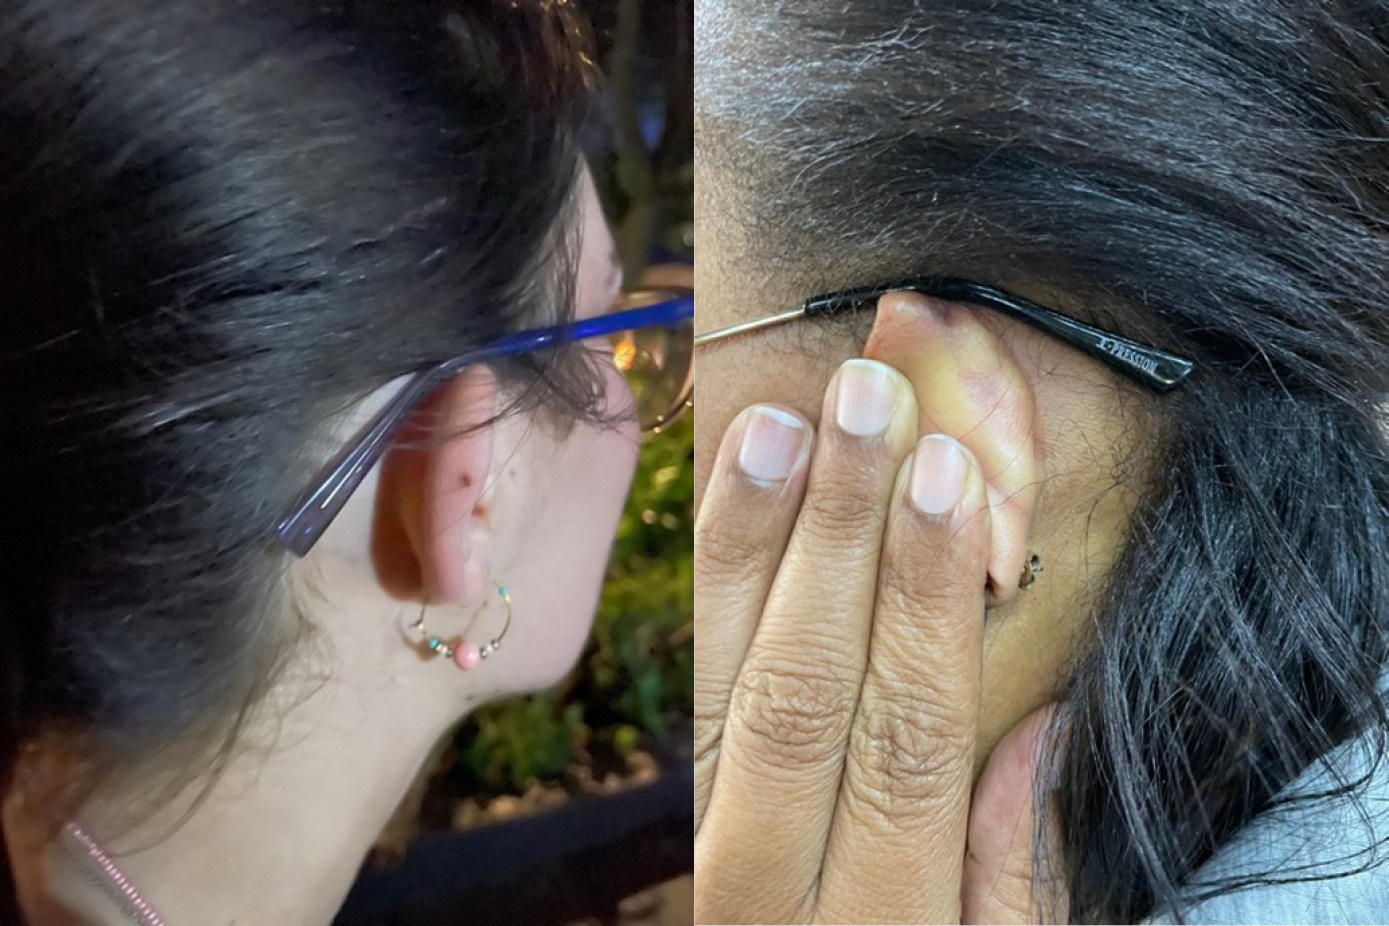
Step 4: Temple curl
You don’t want the curl at the temple tip to
be too early (A), because it will lift the specs and exaggerate the pantoscopic
angle, or make them appear lopsided. Flatten the curls out. As a starting point,
you want the temples resting on top of the ears, without the curl interfering,
as is the case in B.
Fig.7
Step 5: Nose pad alignment
Very often, metal frames come out of manufacturing with the nose pads angled too far away from the frame rim. This will cause the lenses to sit too far out from the eyes. Apart from optical implications, it makes the frame look ugly on the face. As a starting point, push the nose pads in with your thumb and ensure that they are angled nicely.
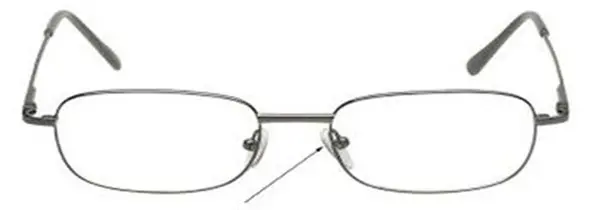
Fig.8
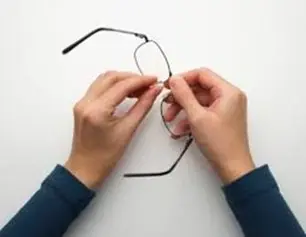
Fig.9
Fitting the frame onto the face
Fig.10
Once the frame has been swept, a poor fit can
only be induced by facial features. Now the dispenser can go to work by
applying the normal rules of fitting.
1. FRONT VIEW
Look for horizontal tilt.
2. TOP VIEW
Both sides must be the same distance from the eyes (eyebrows not always
symmetrical). You want a gentle curve around the face, not straight or a
negative curve.
Fig.11
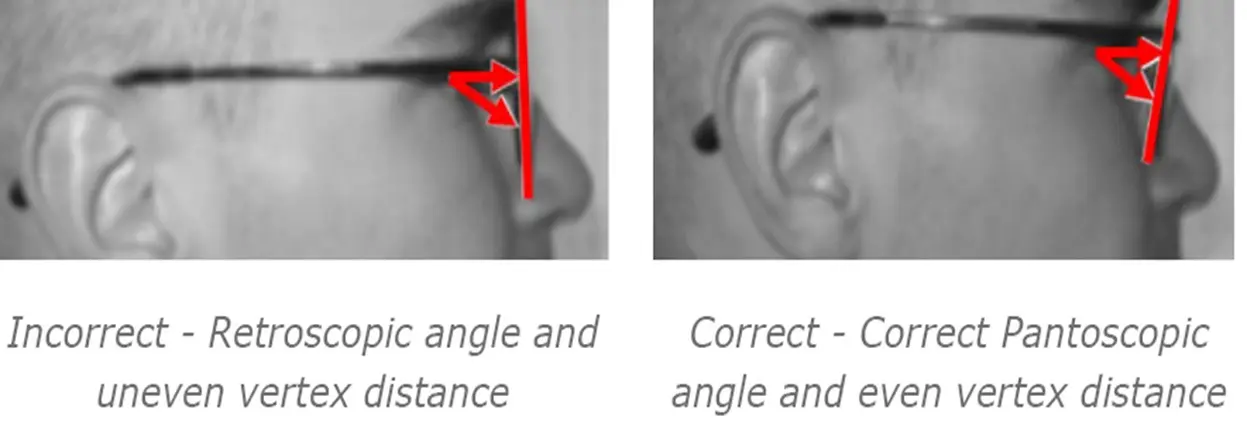
3. SIDE VIEW
Pantoscopic angle. This angle is determined by the point where the temples rest on the ears and the top of the nose bridge. An incorrect pantoscopic angle can definitely affect vision.
4. TEMPLE WRAP
Check that the temple wrap does not apply any unwanted pressure on the wearer’s temples. A temple wrap that is too narrow will push the frame forward to slide down the wearer’s nose, thus making it uncomfortable to wear, and will produce indentations in the wearer’s temples. A temple wrap that is too wide will also result in a frame that is sliding down the nose.
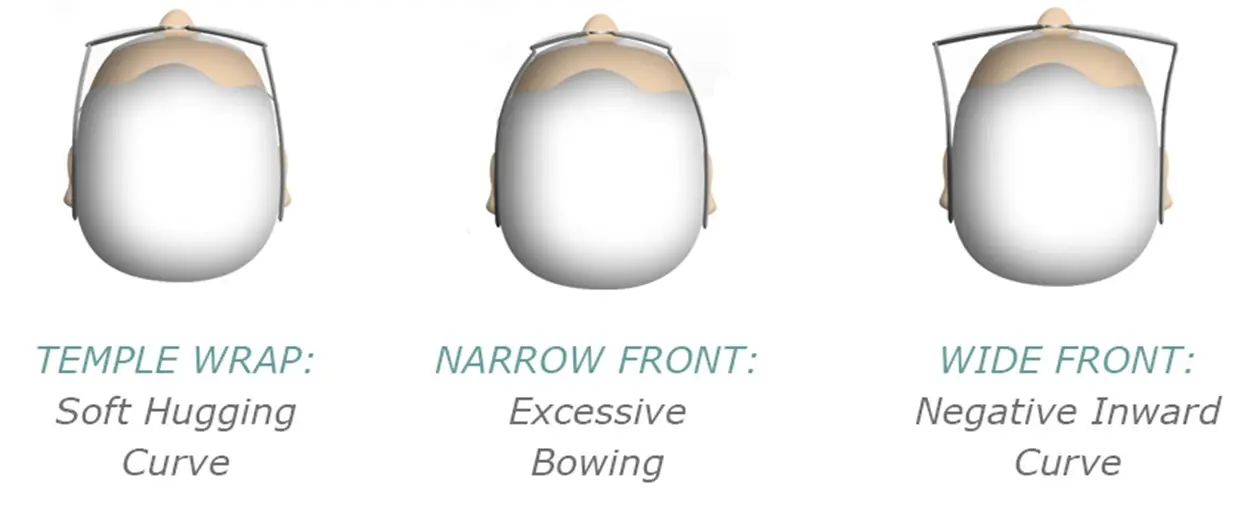

Fig.12
5. TEMPLE LENGTH AND TEMPLE CURL
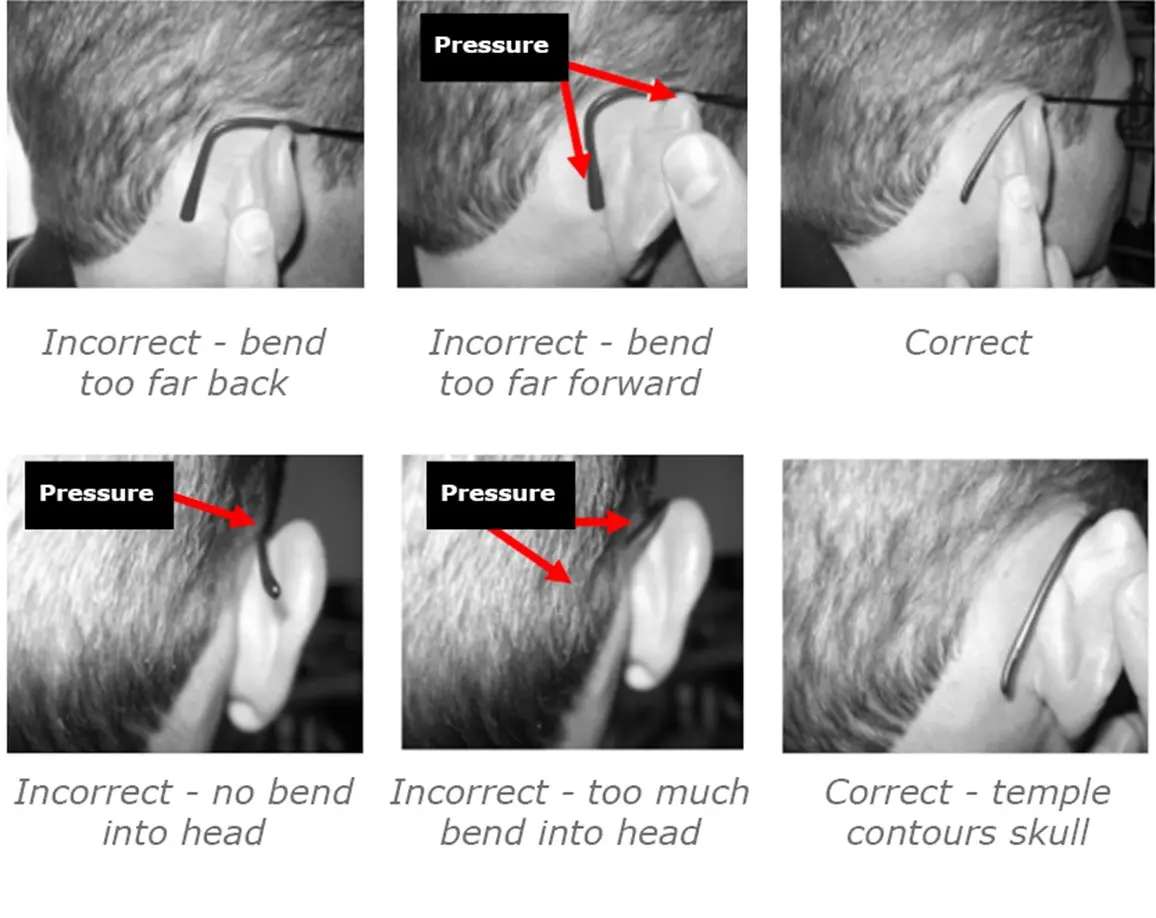

Fig.15 - Ideal Curl
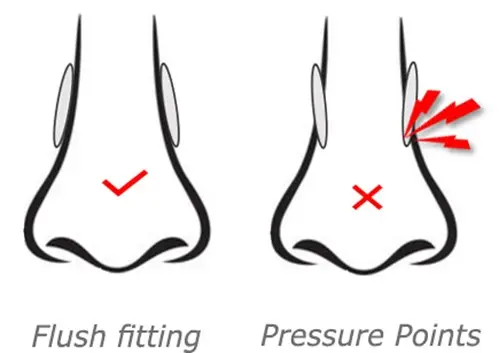
6. THE BRIDGE
Nose pads must be aligned to fit flush with the nose. There are three angles to
consider when adjusting nose pads: The frontal, splay, and vertical angles.
Both nose pads should appear symmetrical, unless the patient has a pre-existing
asymmetry, such as a broken nose, and should be equidistant from the frame.
 Finally
FINALLY
Carefully compare the fit of the current spectacles with the fit of the new spectacles. Any significant difference should alert the dispenser to potential problem areas. I have seen some optometric staff place the spectacles with the temples on a flat surface to see if they are aligned. If you are doing this, you are missing the plot.